|
||
|
You are here : |
|
|
|
|
||
|
You are here : |
|
|
|
How to assemble a metal (aluminum) sectional picture frame such as a Nielsen Framekit.
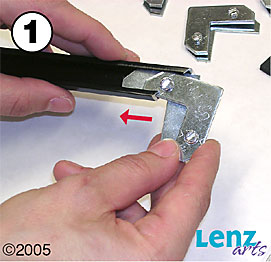
Step 1. Insert a bottom L corner plate (no screws) and a top L corner plate (with screws) into the back channel at the end of one frame side.
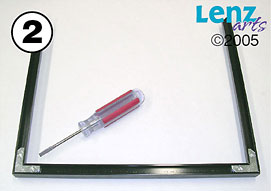
Step 2. Slide an adjacent frame side onto the protruding corner plates and tighten with a screw driver. Repeat to create a U shape with three frame sides. (Also see diagram 4.)
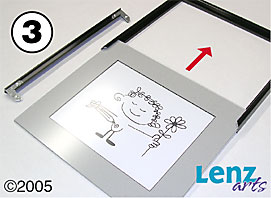
Step 3. Flip your frame right-side up. All at one time, slide your cleaned frame contents into the exposed channel of the frame. (Don’t side glass in alone then your artwork, it may scrape!)
Step 4. Insert corner plates at both ends of the last frame side then slide it on. Flip the frame over and ensure all the corners meet well and are tight.
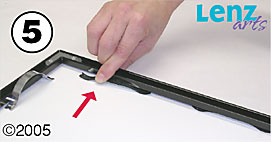
Step 5. Slide your springs, evenly spaced, into the gap along the edges on the back of the frame. These will keep the frame contents toward the front and snug.
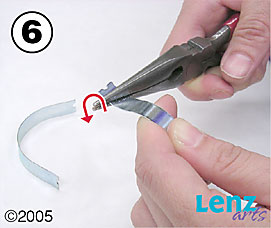
Step 6. If the gap for the springs is too narrow, you can flatten the “wings” of the springs with pliers to make the springs a U shape versus the mild W shape. This will permit the springs to fit. If after bending you still can't get the springs in easily, they aren't necessary and can be omitted.
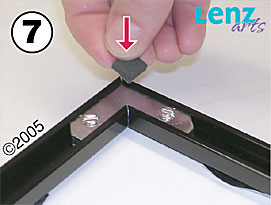
Step 7. Stick a rubber wall bumper onto the plate in each of the bottom two corners. The wall bumpers help keep your picture square on the wall and also help prevent scuffing.
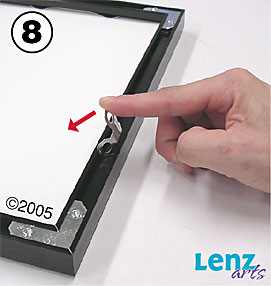
Step 8. Install hangers the channels of the vertical sides by snapping them down in place. Hangers should be 1/4 to 1/3 of the way down from the top. If a hanger slides too easily, remove it and bend the “wings” down then reinsert it.
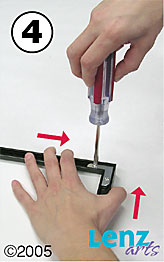
Step 9. If you need to adjust the position of a hanger, place a screwdriver in the hole on the side in which direction you wish to move the hanger, press down the screwdriver handle and push with your thumb.
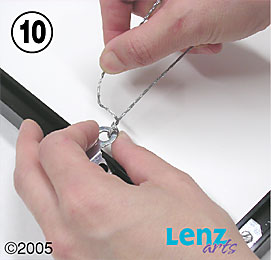
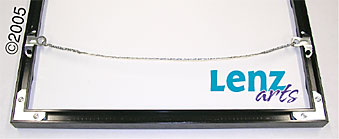
Step 10. Slip the wire (at least 6” wider than the width of the frame) through its holes in the hangers then wrap the wire around itself at least five times. Excess wire can either be wrapped or trimmed off.
Done! Ready to hang. And another option: In our custom framing department we seal our metal frames with a durable cloth tape (such as gaffer's tape), something pioneered in our shop in the 1970s. This helps keep spiders, etc. from making their home in the nooks and crannies of your frame. Looking for Nielsen Framekits cheap? We have Nielsen Framekits cheap! |
||
![]()
Sign up for our Email Newsletter! • Friend us on Facebook!
Lenz Arts • 142 River Street, Santa Cruz, CA 95060 • (831) 423-1935
Site By Echo Alley | ©1999-2025 Lenz Arts, Inc. All Rights Reserved, Privacy Statement, Contact Us